Your backyard can be more than just an area you need to mow on Saturdays. Even on a small lot in a congested suburban area, you can grow enough food to put away dozens of quarts of delicious homegrown produce for consumption throughout the year. And it is fascinating to take note of the wide variety of wildlife with which you share your domain. You may even want to invite more!
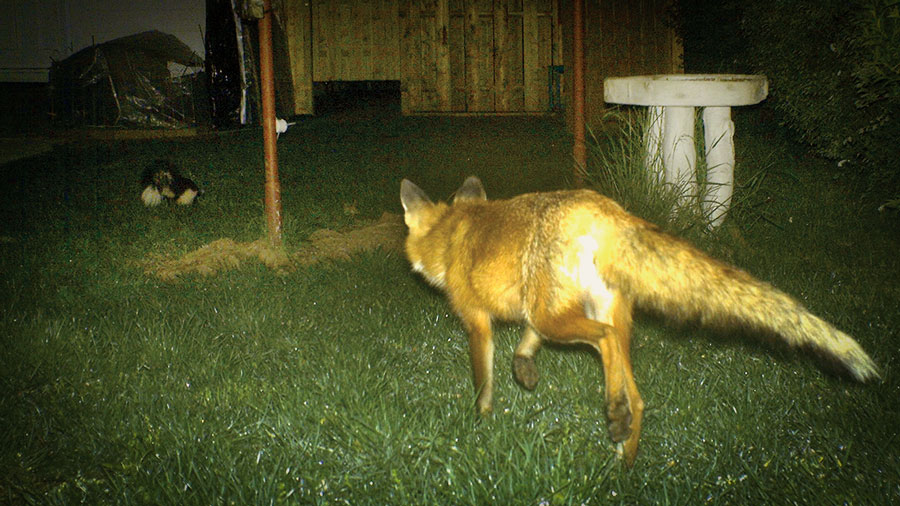
Daytime companions in your backyard likely include squirrels, rabbits, and sometimes not-so-welcome groundhogs. The real party begins at sundown, when raccoons, skunks, opossums, deer, and foxes take their turn, perhaps joined by an occasional bear. The easiest way to monitor nocturnal activity is with a game camera, relatively inexpensive and readily available at sporting goods stores. Although I’ve set up game cameras in remote rural areas for years, some of my most interesting wildlife images have come from my own backyard, revealing unseen dramas including raccoons fighting over a morsel of food, a fox carrying a rabbit in its mouth, an opossum carrying its babies on its back, and a standoff between a skunk and a fox. (Two-legged nighttime prowlers might also be exposed lurking about.) If you’re worried about bothering the neighbors, a bright flash for nighttime illumination can be replaced with an invisible infrared flash, although it will result in a grainier monotone image.
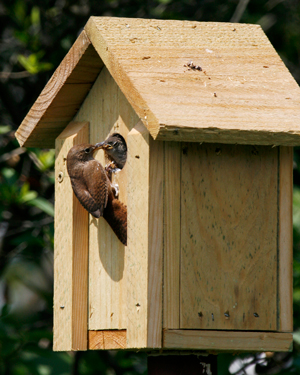
Nothing’s going to liven up your yard more than the spring arrival of birds—the more, the merrier! Robins need nothing more than a grassy plot where they can tug on tasty worms, but most other types must be plied with birdseed, suet, or peanut butter before they will show up. Although it can be as simple as tossing birdseed out on the lawn, ground feeding should employ only well-drained low platforms to discourage seed spoilage and molding. And ground feeding might also attract other not-so-cute visitors, like rats and mice.
There is no end to the assortment of architectures available in bird feeders, but they can be as simple as gallon milk jugs with holes cut into them, suspended from tree branches. Or use empty tuna fish cans cleaned in hot soapy water as holders for homemade suet or peanut butter mixes (recipes may easily be found online). A suspended piece of firewood drilled with large holes packed with peanut butter works well for attracting woodpeckers. For birds that visit your yard in large groups, such as sparrows and starlings, special feeders with spring-loaded perches help control excessive mass feeding by lowering a barrier over the seed trough when too many attempt to feed at once. Hummingbirds might appear around some blossoms, especially reddish ones, but a hummingbird feeder will bring in more of them.
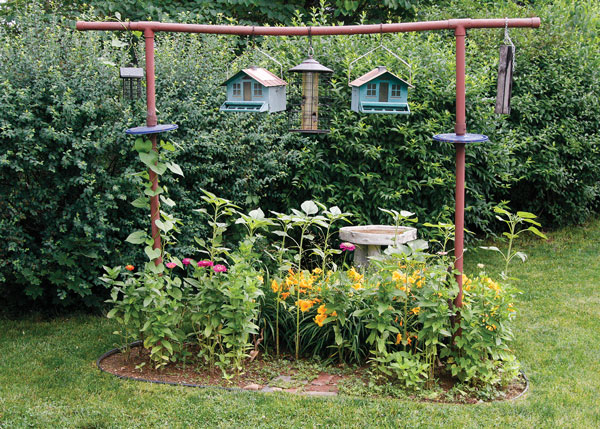
Our feeders and suet holders hang from a homemade six-foot-long birdfeeder station constructed with PVC pipe and located within a flowerbed dedicated to attracting birds. Below the feeder station, we plant sunflowers and zinnias, whose seeds coax all kinds of birds to the banquet, while we watch and take pictures. Seeds that drop from the feeders sprout into plants which, in turn, provide more seed if allowed to grow to maturity. Tulips, hyacinths, and other spring flowers in the bed give early spring color. A bird bath, which can be as simple as an upside down garbage can lid, in the back of the bed provides both hydration and baths for the birds, particularly fun watch as they fling water about. Grackles and crows soften dried-out bread cubes and dried corn kernels in the water before consuming them. Thrilling moments arise when hawks, generally infrequent visitors, buzz the bird feeder area looking for a quick meal; a slow bird or an inattentive squirrel.
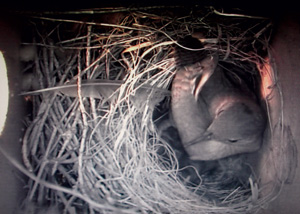
Backyard birdhouses will attract winged tenants during the nesting season, usually the only time birds will occupy a nest, even in inclement weather. Prior to construction, make sure to check the size and proportion specifications required for the type of bird you hope to attract; one size does not fit all. For a real thrill, install a small video “birdhouse camera” which will allow live monitoring of activities within the nest on a TV in your house. For three years we have watched house wrens lay and hatch eggs, feed the hatchlings, and grow before leaving the nest forever. These cameras are designed specifically for birdhouses and will not impact the birds’ lives at all. Check online for suppliers, a good one being Hawk Eye Nature Cam.
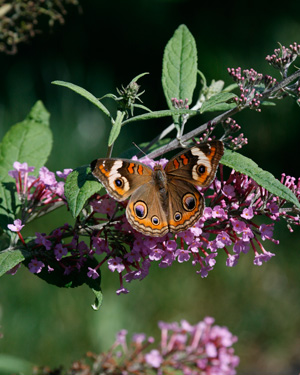
Think about how other shrubs and trees enhance your yard. While serving as attractive visual barriers, butterfly bushes entice a variety of those colorful flying jewels for much of the summer and early autumn. And viburnum berries will feed birds later in the season. Dedicated wildflower and perennial beds also provide sustenance for a multitude of bees that in turn help pollinate the vegetable garden. It seems as if we are always pulling unwanted maple saplings from the edges of our beds and bushes. But letting one grow for a few years into a tree will provide habitat for nesting birds and can even be tapped for sap, which you can collecting and boil down into delicious maple syrup.
By using certain time-tested practices, a productive garden may be set up even in a small yard. In our 15 x 8 foot vegetable garden we encourage the plants to grow upward rather than outward, leaving space for more plants. Our half-dozen tomato plants, from which we harvest hundreds of tomatoes, are trained to grow upward within a box frame made of electrical conduit tubing. Our half-dozen pepper plants, which produce dozens of peppers, are contained and trained within standard tomato cages. And a five-foot-tall wire trellis attached to the garden fence drastically reduces the footprint of our six cucumber plants that provide hundreds of cucumbers. Peas planted along the garden fence, made of treated 2x4s and lattice, have virtually no footprint as they naturally climb upward out of the way of other plantings.
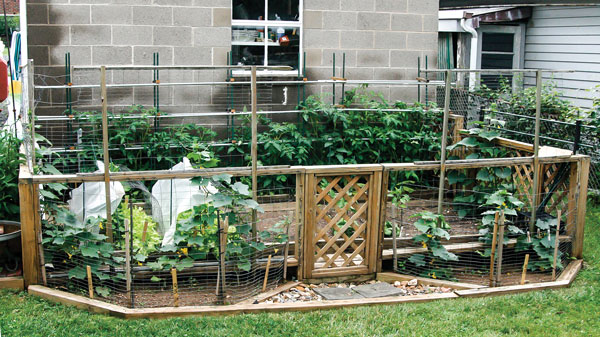
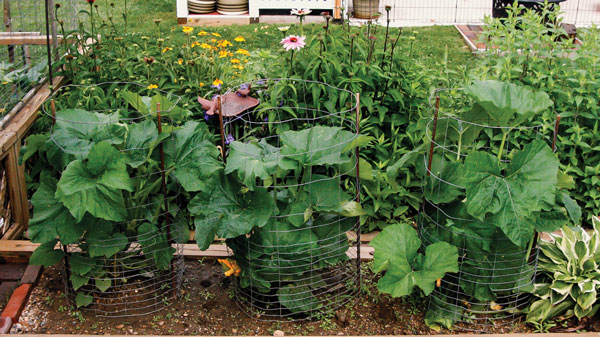
Succession planting is a technique used to increase garden productivity by growing two different crops at different times in the same space. Planting cool weather peas along the fence early in the season before the warm weather cucumbers need the same space is an example. We plant lettuce in the same space that peppers will later occupy, and radishes are planted in the future tomato beds.
Although it is generally recommended that planting wait until all danger of frost is past, we extend the growing season a bit for lettuce by using “mini-greenhouses” made simply by arching sections of stiff metal garden fence over the rows of greens and covering them with rolled-up plastic which can be easily pulled away during the day to provide full sun and for watering. On windy, rainy days the covers also keep the lettuce from becoming wind burnt and from gathering rain-splashed grit. Later in the season, the same pieces of wire fence can be used as tomato, pepper, or zucchini cages. Cared for properly, these versatile fence sections will last for years.
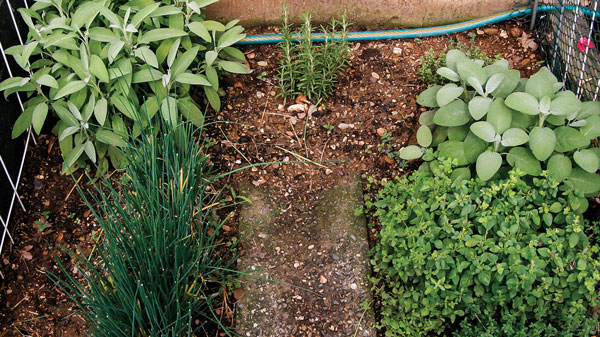
And we do not restrict our food production to the “official” garden. In small areas here and there around the yard we have a spearmint bed, a small herb garden, and a cold frame that we use for basil and parsley. A few potted vegetables on the patio, such as jalape—os, extend the production areas even further. A vegetable bed for zucchini in cages lies between our wildflower and perennial beds. And our 4 X 4 foot herb bed holds rosemary, oregano, marjoram, sage, thyme, and chives, each of which we use fresh in season or dry for later use. Garlic, planted in October and harvested in summer, also has its own bed shoe-horned between other plantings.
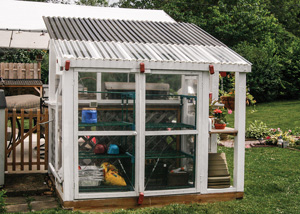
Populating a vegetable garden can be as simple as buying seedlings at your local garden shop. A cheaper way, albeit far more time consuming, is to plant your own seedlings in commercially available small peat pots held in plastic trays. Or use plastic Solo cups as starter pots—they work fine and are reusable! Starting your own seedlings demands a lot of warm, well-lit indoor space which, unless you go to the trouble of installing “grow lights”, usually requires rotating the plants outside during the daylight hours of early spring. To alleviate these issues we built a small greenhouse, only 2 X 6 feet by 5 feet high, to house all our plants. We built it with treated lumber, used two old shelving units inside to hold the trays, and covered it with plastic material from the local fabric shop--much cheaper than Plexiglas. To offset the chill of early spring nights we use two very small electric heaters to keep the seedlings warm and toasty.
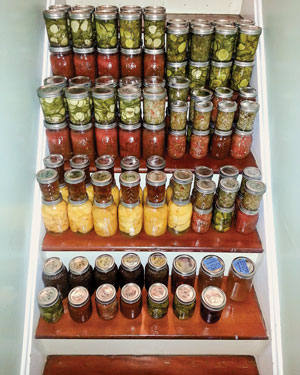
Your harvested produce can be stored for months by processing and canning or freezing. Tomatoes, peppers, and onions make dozens of quarts of sauce and salsa. Jalape—os make pints of tasty jelly. Cucumbers become pints of sweet & sour pickles, dill pickles, and various relishes. Zucchini, peas, peppers, herbs, and spinach may be frozen. And garlic bulbs may be suspended in a cool, dark area such as a basement for long-term storage.
Ingredients
Preparation
In a bowl, cover cucumber slices, onion, green pepper, and salt with ice cubes, let stand at room temperature for 3 hours, then drain thoroughly. Bring remaining ingredients to a boil in a large kettle, then add drained vegetable mixture. Heat thoroughly, but do not boil. Then either pack using preferred safe canning method or refrigerate for short- term consumption.
Ingredients (makes 3 to 4 pints)
Preparation
Combine the chopped vegetables in a large bowl, sprinkle with ¼-cup of salt, cover with cold water and let stand. After two hours thoroughly rinse and drain vegetables, pressing out as much liquid as possible.
In a large pot, bring the sugar, vinegar, and seeds to a boil, add the drained vegetables, bring back to a boil and simmer for 10 minutes. Using a slotted spoon to help drain excess brine, pack cooked relish into hot sterilized pint jars leaving ½-inch head space. Discard leftover brine. Use favorite safe canning method for long term storage or refrigerate for immediate short term use.
Ingredients (makes 6 pints)
Preparation
Mince all peppers in a food processor. In a five-quart pot combine chopped jalape—os & red peppers, sugar and vinegar. Bring to a rolling boil over high heat, reduce heat slightly then continue to boil for 3 minutes. Remove from heat and cool for 5 minutes. While stirring constantly, add the pectin (Certo-brand works best for us). After cooling for 2 more minutes, stir again for 1 additional minute then pour jelly into hot, sterilized jars. Immediately cap jars with sterilized lids and bands and allow jars to cool slowly creating a vacuum seal