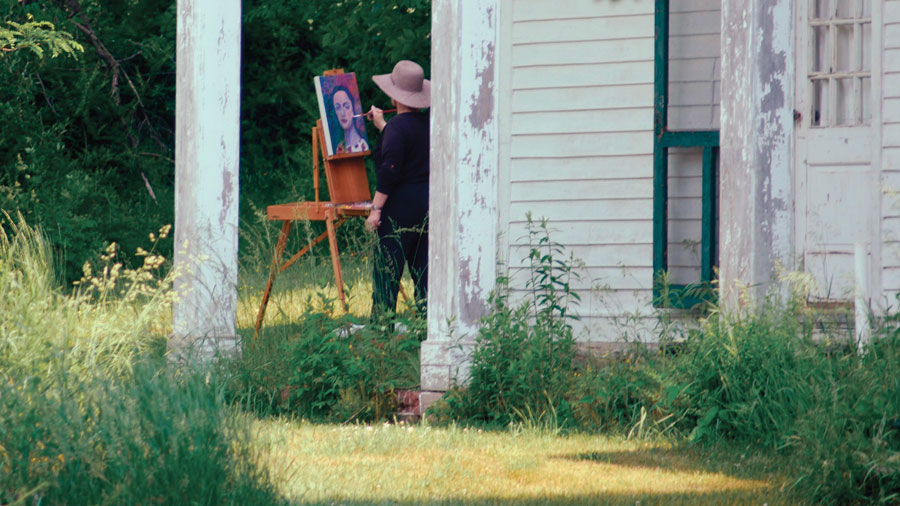
Peters Valley Crafts Center is a non-profit educational center specializing in fine craft and art. One of only six craft schools of its type in the country, and unique to Northwest New Jersey, it has grown from a small artists' collective in the early 1970s to a nationally recognized center for craft education. 2015 marked the 45th Anniversary of the center. The campus, located in the Sussex County village of Layton, operates in cooperation with the National Park Service, nestled in a natural setting within the Delaware Water Gap National Recreation Area. The Craft Center's mission is to nurture craft in America by offering programs which promote the skills and core values of traditional craftsmanship and creative expression in a contemporary context and cultivate knowledge and leadership in the field of fine craft education.
Jewelry making runs in my family, so my appreciation for the skills required to create exceptional pieces is easy to understand. My education in jewelry began long ago when I was a little girl and my father began to make silver bracelets, rings, and pendants. He and my stepmother, Pam, have run jewelry shops in various locations in Bucks and Hunterdon counties for umpteen years. My sister, with whom I have worked for the past fifteen years, started her own jewelry business in 1990. She can turn a block of wax into a cherished charm. To me, making jewelry is a path to sustenance, and although I have beaded jewelry for many years, and designed a piece here and there for my sister's sports jewelry inventory, I wanted to learn, firsthand, the ins and outs of casting precious metals.
I had known about Peters Valley for a long time. I'd been to their annual craft shows and purchased items at their gallery which always seemed full of not only beautiful jewelry, but also pottery, framed photographs, forged iron, wooden toys, musical instruments, gorgeous clothing all handmade and gleaming with quality and originality. When I downloaded their course catalog I was equally impressed. There were over one-hundred courses in blacksmithing, ceramics, fibers, photography, woodworking and fine metals! Almost twenty fine metal courses were listed, running the gamut from novice to expert. And there was the one I wanted: Casting Basics. It was a five-day course in August when I had a stretch of spare time. I decided to treat myself to a little summer camp for adults.
Layton, where Peters Valley is located, used to be known as the Village of Bevans, and the central historic barns and buildings housed the original blacksmithing, ceramics and woodshop and fibers studios. As the programs grew and expanded, additional buildings where required, and some of the center's core programs were moved about two miles down the road to Thunder Mountain, where larger, more modern facilities adapted for working studios sit atop a hill, surrounded by fields and overlooking a small lake. It was there that my classes took place. Students can reserve lodging and meals right on the PVCC campus, but since my home is only 45 minutes away, and my best friend lives with ten minutes, I passed on both those options.
The Peters Valley faculty includes internationally recognized and accomplished artisans in their fields. Our beginner's course was to be taught by the Department Head of Fine Metal, Frederick Marshall, an award winning jewelry artist and educator with over thirty years experience. His work inhabits many public and private collections, and graces scores of books and periodicals. Marshall, who and has been an Artist in Residence at Peters Valley Craft Center since 1991, has also received numerous grants and fellowships for his work. Needless to say, I felt confident in my instructor's ability.
I got ready for school, getting together the items required for the class: safety glasses, an exacto knife, old towel, shot silver for casting, plus some borrowed professional carving tools from Pam, and headed north for opening day. When I arrived there were around fifteen students with me. They were of all ages and backgrounds, some with more experience than others. I know that two of them studied jewelry in college, two were knife carvers, and one came all the way from North Carolina for the course. We all wanted to see how casting was done, and I think most of us had visions of our own shop where we could make jewelry to our hearts' content. The workshop was equipped with workbenches and tools for everyone to use: files, Bunsen burners, and inventive adaptations to use for carving, like old dental tools and a cheese grater! Another room contained the heavy equipment used for casting.
On the first day we learned about cuttlefish bone carving. You may have seen a cuttlefish bone mounted on the side of a pet parrot's cage, where the bird can use it to sharpen its beak and supplement its diet. Cuttlebone also makes a perfect casting medium for jewelers. It is soft and easy to carve but can withstand high temperatures. You cut the bone in half and make a mold on the soft inside walls, sometimes by pressing a model directly into the bone. But we carved our own designs into the walls. The bone has little wave-like patterns in it, so I stamped a circle with a copper pipe and added some sea gulls and a sun for my pendant-to-be.
We then learned how to file a channel, called a sprue, into the halves to receive the molten metal, then added tiny vents for air to escape when it filled the space. Then I sanded the edges of the two halves so they fit together so tightly that no light was visible between them. I sanded the bottom flat so the mold would stand up vertically with the sprue facing up, and taped the two halves together with blue painters tape, ready for the hot, molten silver.
When we were ready to cast, Mr. Marshall heated the silver and poured it into the bone mold. We waited twenty minutes then placed our molds in water to cool. He disassembled my cuttlebone while I waited with great anticipation. Gone were my delicately etched seagulls flying beneath a warm sun floating over gently wafting waves. Instead there was nothing but a big blob! I had purchased pure silver, not the regular casting shot, which is really an alloy with some other metals added for stability. Dang it!
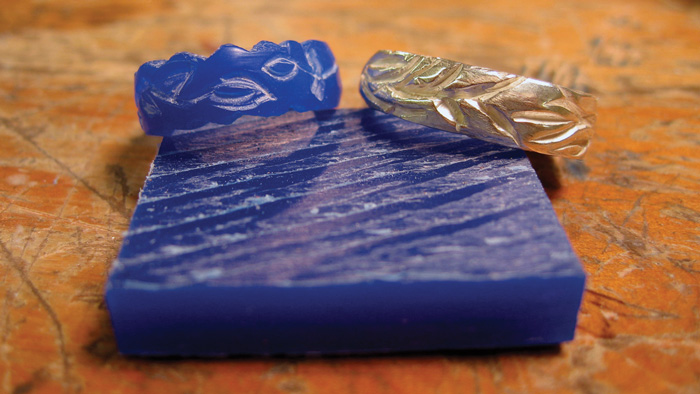
The next morning, our instructor demonstrated how to carve a ring out of wax using dental tools. He was done in five minutes. Wax model making is the jeweler's bread and butter; the more practiced your carving skills, the better your final product. What you carve is what you get! Anyway, now it was our turn. OK, I can do this. I picked up a piece of wax with a little hole in it and got started. I started to round the sides with a hacksaw and a file to make a dome. Then we lost our power when a big summer storm passed through. After waiting an hour, our teacher sent us home with instructions: "Make a ring tonight and bring it back tomorrow." My forty-five minute drive home took an hour-and-a-half dodging downed trees and circumventing closed roads. When I got home, I started to work my wax with an exacto knife, the only tool I had. This was going to take until midnight! My husband suggested I use his wood files, and off to the garage we went. I was done in two hours.
On Wednesday morning, Mr. Marshall asked, "Did you do your homework?" I opened my box and showed him. I think he liked it, but it was time to move on and add to our wax collection. Rings are carved in hard wax, but other things can be fashioned in medium and soft wax that comes in different thicknesses. Forms are easily cut, and the wax is bendable with just the warmth of your hands so that your models quickly become three-dimensional. Picture a model of a leaf floating through the air. Then we learned how to place a hidden bale on back of each piece as well as a burr. That night, we were allowed to stay late to make up for lost time the day before, and I got my two rings, two little flowers and two pendants ready to go. I stayed at my friend's house instead of driving all the way home.
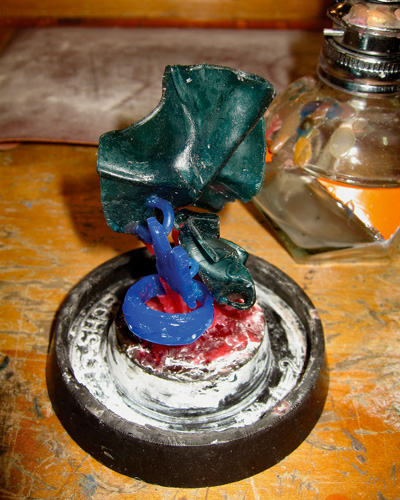
When I came in on Thursday I thought I knew what I was doing. Each wax needed be edged, and then attached to the wax base of a flask that would hold them as they were made into molds to be cast with molten metal. The trick is to heat your exacto knife in the Bunsen burner, then stick the hot knife between the burr on the lowest point of your piece and the wax bottom so that the two melted sides can fuse. The models must be freestanding and cannot touch the flask edges. The first was easy; it contained the ring and two small pendants I was making. The second proved more difficult than I expected. I was trying to mount lots of pieces on a small base only about four inches across. Also, I have vision in only one of my eyes, and, although I excel at close-up work like cross-stitching and lace tatting, it was exasperating for me to judge exactly where to place my hot knife in that tiny space. I struggled until a welcome break at lunchtime. It was time for the auction!
At the weekly auction, faculty and students items donate items for public sale in order to raise money to operate Peters Valley. The grand finale auction takes place every November, along with a benefit dinner, one of the main fundraisers of the year. But this junior auction was no slouch, no junk in sight. There were dyed scarves, screen-printed pictures, iron pieces made by the blacksmith, wonderful photography, and, of course, copper and silver jewelry. Each piece was auctioned for anywhere from $3 to $200. I bid and won a copper bracelet made by my instructor, Frederick Marshall!
Back in class, my battle resumed only a couple of hours left to get everything ready. Somehow, with welcome help from our class assistant, Nicki, I was able to get all my wax models secured on the base of the flask. Meanwhile, Marshall prepared the casting room, first mixing a substance that looks like flour with water. The resultant compound, called "investment", kind of like plaster of Paris, but it requires precise amounts and temperatures for successful use. I carefully poured the mixture down the sides of the flask all around my precariously placed wax models, until it just covered the waxes. The flask was then put into a vacuum, sealed and tapped to get rid of any air bubbles. Then I added more paste to the flask top and took it to the kiln where it would cook for twelve to fifteen hours overnight. It was a long day, I went home.
On the last day of class, we cast our silver jewelry. Dating back to the Egyptians, investment casting is also known as the lost wax process. That's what happened overnight in the kiln: the wax melted away and left molds inside the hardened investment that surrounded the models mounted in the flask. Now it was time to stuff hot, liquid silver into the empty spaces so that it would congeal into beautiful, shiny jewelry. To do this, our instructor used a small, spring-loaded centrifuge secured in a big round tub. The centrifuge arm was free to spin around a vertical axle, like the hands of a clock, and my flask was mounted horizontally on an arm so that it's opening faced the center. Mounted in the center was a crucible where the silver would be melted with a torch. There are ample explanations and videos on the Internet that will explain the details of the process for you, if you care to look.
I had gotten some scrap silver jewelry from my sister and mixed that with my leftover pure silver for the casting. My instructor put it all in the crucible and began apply the torch. "Not all of this is melting," he said. "Did you have base metal or a catch in your scrap?" Not that I know of. "This may not take," he adds. Great. All that work for nothing!
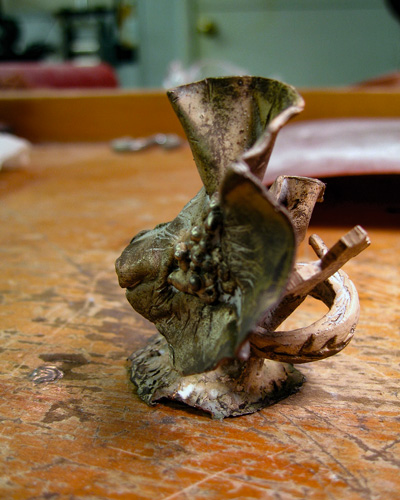
It seemed like you would get five-degree burns if you weren't careful around this set up. Eventually my silver melted and Marshall pulled the pin on the spring-loaded arm. POP! The molten silver shot into the flask to fill the molds. Next I lifted the flask out to put into a tub of water to cool. We were supposed to move it back and forth in the water to dissolve the white powder. I dropped it! I stuck my hand down what felt like a slimy mud hole, but finally found my casting on the bottom of the tub and got my first look. Not too bad! I heated it to remove more residue, then washed it with soap and water. I snipped the burrs off, filed the rough edges, then pickled (cleaned) it, and finished it off with a buffing wheel and tumbler.
I was happy and out of there by 3pm, satisfied with fresh, relevant experience in a craft that has always been a part of my life. Wax carving is an art that needs some talent and practice, practice, all of which I am ready to dedicate. I made things I thought were simple so that I could come home with something. But I also know that for my next casting project I will let someone else add those burrs, get them mounted, and deal with molten metal. I respect the dedication of skilled artisans like Frederick Marshall, and their willingness to share their experience with the rest of us.
The adult summer workshop series begins in May and runs through the end of September, offering more than 125 classes in seven different disciplines: Blacksmithing, Ceramics, Fibers (weaving and Surface), Fine Metals, Photography Woodworking and Special Topics. There is also a Children's Creativity Day Camp that offers six one week sessions and exposes school age children to nature and the arts. To learn more please visit their website.
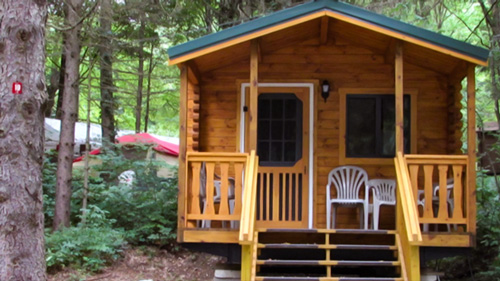
Located in Sussex County near the Kittatinny Mountains the camping resort offers park model, cabin and luxury tent rentals as well as trailer or tent campsites with water, electric and cable TV hookups on 200 scenic acres.
Follow the tiny but mighty Wallkill River on its 88.3-mile journey north through eastern Sussex County into New York State.
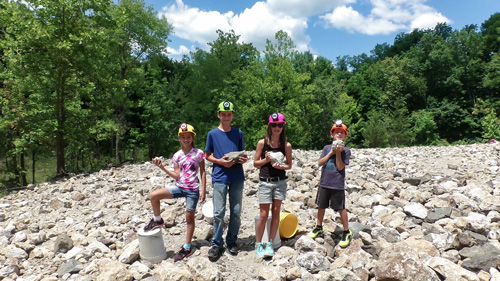
“The Fluorescent Mineral Capitol of the World" Fluorescent, local & worldwide minerals, fossils, artifacts, two-level mine replica.
Peters Valley shares the experience of the American Craft Movement through interactive workshop learning through a series of workshops. A shop and gallery showcases the contemporary craft of residents and other talented artists at the Crafts Center...ceramics, glass, jewelry, wood and more in a beautiful natural setting. Open year round. Closed Thursday.